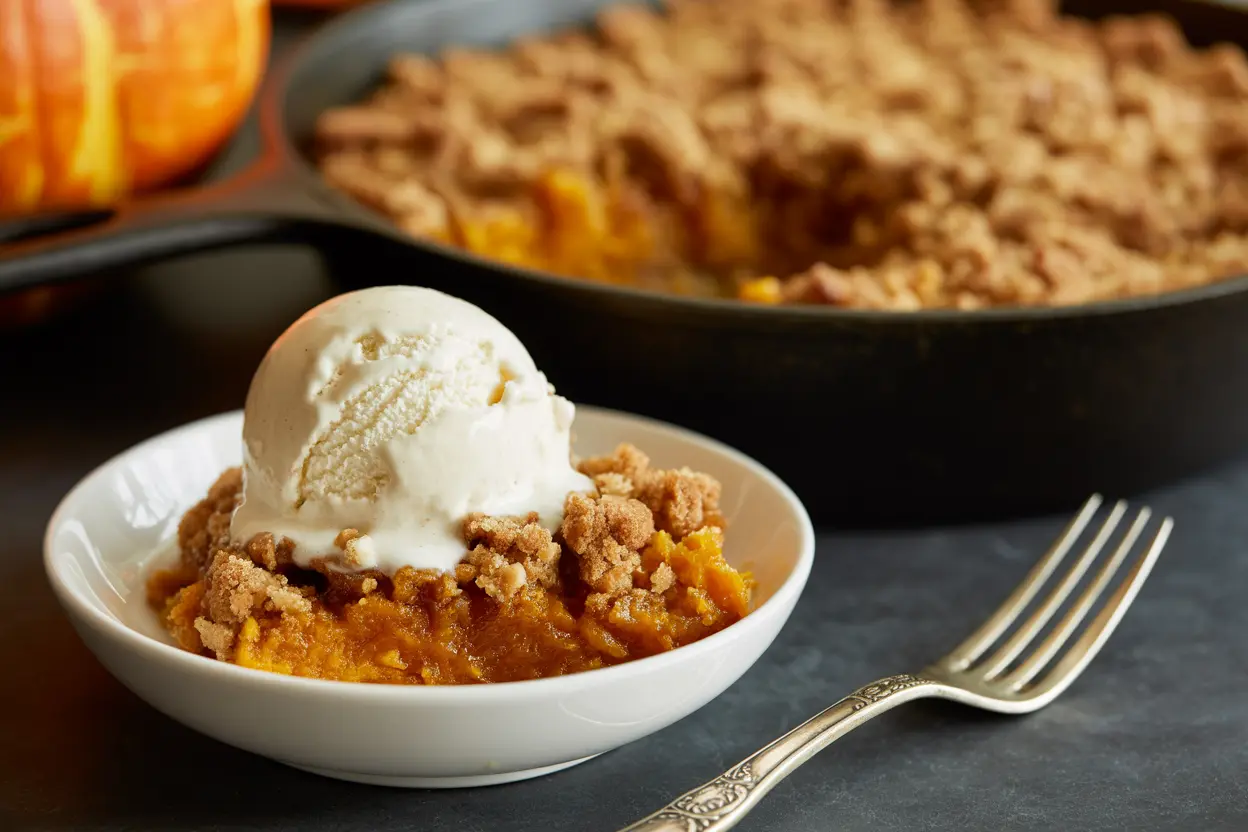
Pumpkin bars are one of those treats that show up and steal the show every fall-and for good reason. These chocolate-swirled pumpkin bars are incredibly moist, beautifully spiced, and topped with melty chocolate goodness in every bite. Whether you’re baking for a cozy family night or bringing a tray to the office, these bars hit the sweet spot between nostalgic and show-stopping. In this article, I’ll walk you through how to make the perfect pumpkin bars, share tips on getting that signature swirl, and answer all your questions-from freezing to storing. Let’s dig into the fudgy magic of pumpkin bars.
Table of Contents
Why Pumpkin Bars Are the Cozy Dessert You Didn’t Know You Needed
The memory behind chocolate-swirled pumpkin bars
I still remember the first time I tried making pumpkin bars. It was late October, leaves were swirling in orange clouds outside my Asheville kitchen window, and the air smelled like chimney smoke and cinnamon. I had a can of pumpkin puree, a half-used bag of chocolate chips, and a craving for something warm, sweet, and a little messy. I didn’t follow any real recipe-just tossed together what felt right. What came out of the oven? A fudgy, golden square with a soft pumpkin center and a ripple of melted chocolate on top. And just like that, I was hooked.
These chocolate swirled pumpkin bars have become a seasonal staple in my kitchen, and not just because they taste amazing. They’re simple, unpretentious, and loaded with flavor. They represent what fall baking should be-easy, cozy, and crowd-pleasing. I now make them every year as the first official sign that sweater weather has begun. The swirl of chocolate not only adds richness but also makes the bars visually stunning, with that marbled look that feels a little fancy without trying too hard.
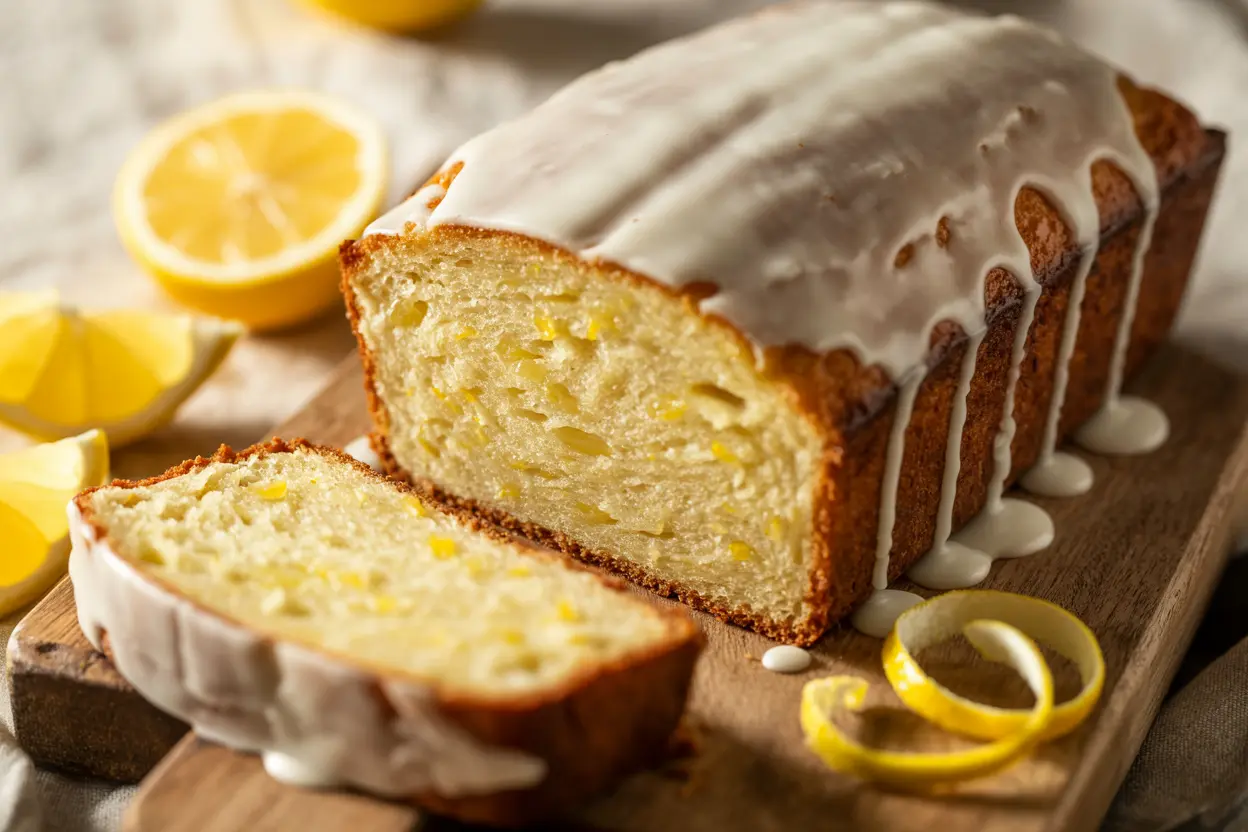
If you’re a fan of pumpkin bread, like this cinnamon-glazed version, you’ll fall hard for these bars. They’re denser, richer, and just sweet enough without going overboard.
How fall baking shaped my cooking journey
Before I became the guy behind recipes like these epic pumpkin cheesecake bars, I was just someone who loved the quiet of the kitchen when the weather turned cool. Fall baking brought me joy long before I could properly dice an onion. There’s something comforting about the rhythm of stirring batter while cinnamon fills the air.
What I love about pumpkin bars is that they give you permission to slow down. There’s no frosting to whip, no layers to fuss with, and definitely no special gadgets required. It’s just you, a mixing bowl, and a few humble ingredients that come together like magic. The chocolate swirl adds a little drama, sure-but it’s the kind you can pull off even on a lazy Sunday afternoon.
And that’s exactly what this recipe is about. No fancy tricks. Just good, solid flavor and texture that satisfies on the very first bite.
Ready to dive into the fudgy center of these fall-inspired bars? Next up: how to get that perfectly moist texture, every single time.

Fudgy Chocolate Swirled Pumpkin Bars
Equipment
- 9×13-inch baking pan
- Parchment paper
- Large mixing bowl (for wet ingredients)
- Medium mixing bowl (for dry ingredients)
- Small microwave-safe bowl (for melting chocolate)
- Whisk (for mixing)
- Spatula (for folding and spreading)
- Knife or skewer (for swirling)
- Measuring cups and spoons
- Wire cooling rack
- Oven
- Toothpick (for testing doneness)
Ingredients
- 1 cup pumpkin puree
- ¾ cup granulated sugar
- ½ cup brown sugar packed
- 2 large eggs
- ½ cup vegetable oil or melted butter
- 1 tsp vanilla extract
- 1 ¾ cups all-purpose flour
- 1 tsp baking powder
- ½ tsp baking soda
- ½ tsp salt
- 2 tsp ground cinnamon
- ½ cup semi-sweet chocolate chips melted
- ½ cup mini chocolate chips for topping
Instructions
- Preheat oven to 350°F (175°C). Grease or line a 9×13-inch baking pan with parchment paper.
- In a large bowl, whisk together pumpkin puree, granulated sugar, brown sugar, eggs, oil, and vanilla until smooth.
- In a separate bowl, combine flour, baking powder, baking soda, salt, and cinnamon. Gradually fold into wet mixture until just combined.
- Pour batter into prepared pan, reserving ½ cup. Mix reserved batter with melted chocolate to create a chocolate mixture.
- Drop spoonfuls of the chocolate mixture over the pumpkin batter and swirl gently with a knife. Sprinkle mini chocolate chips on top. Bake 25-30 minutes or until a toothpick inserted in the center comes out clean. Cool before slicing into bars.
Perfecting the Base – The Secret to Fudgy, Moist Pumpkin Bars
Why pumpkin puree matters and how to avoid dry bars
Pumpkin puree does more than bring that signature flavor to your bars-it’s the secret weapon behind their moist, melt-in-your-mouth texture. But not all pumpkin puree is created equal. You’ll want to use 100% pure pumpkin (not pumpkin pie mix) to avoid extra sugar and spices throwing off the balance. The moisture content in canned pumpkin also varies by brand. If your batter ever feels too thin, add a tablespoon of flour to tighten things up.
In my own kitchen, I’ve tested this recipe using both store-brand and organic pumpkin, and while the flavor stays consistent, texture can shift slightly. What really locks in that fudgy goodness is pairing the pumpkin with the right blend of brown sugar and oil. Brown sugar adds deep, molasses-y notes that perfectly complement pumpkin’s earthiness, while the oil ensures that soft crumb that makes these bars feel almost brownie-like.
When I first experimented with this recipe, I used melted butter instead of oil-and it worked well for flavor, but the bars came out slightly firmer. If you want a richer taste with a slightly cakier bite, melted butter is your go-to. But if you’re after that soft chew, stick to vegetable oil or even avocado oil for a healthier twist.
This texture-forward approach mirrors the richness of pumpkin dump cake, but in a form you can slice and carry to the neighbors.
Brown sugar + oil = the softest crumb every time
The real MVP combo here is brown sugar and oil. Here’s how they work:
| Ingredient | Why It Matters |
|---|---|
| Brown Sugar | Adds moisture and caramel-like depth that boosts pumpkin flavor |
| Vegetable Oil | Keeps bars tender and moist for days-no drying out |
Combine these with eggs, pumpkin puree, and just the right amount of cinnamon, and you’ve got a batter that’s incredibly forgiving and flavorful. Even if you’re not a confident baker, you’ll find success with this base.
If you’ve ever made pumpkin chocolate chip cookies and loved that soft interior, these bars take that texture and dial it up with more moisture and height.
It’s this kind of recipe that keeps me grounded in why I started sharing my food in the first place-because great food doesn’t need to be complicated. It just needs to be built on smart flavor combos and a bit of care.
Coming up next: I’ll show you how to get that beautiful, bakery-style chocolate swirl-and why it’s easier than you think.

The Chocolate Swirl Effect – Marbling Tips & Toppings
Melting, marbling, and layering tips
The swirl is what takes these pumpkin bars from humble to hypnotic. It’s not just about aesthetics-it’s about flavor distribution. That ribbon of semi-sweet chocolate cuts through the sweetness of the pumpkin and gives you that melty, fudgy bite you want in every square.
Here’s how I do it:
Once your pumpkin batter is fully mixed and spread evenly in your baking pan, melt ½ cup of semi-sweet chocolate chips. You can do this in the microwave in 30-second bursts, stirring each time until smooth. Then, drop spoonfuls of the melted chocolate directly onto the pumpkin batter.
Use a butter knife or skewer to gently swirl the chocolate through the batter in a figure-eight motion. Don’t overdo it-you want distinct swirls, not chocolate soup. This step is easier than it looks and wildly satisfying. If you’ve ever made pumpkin cupcakes, you’ll know how texture plays a role in presentation too, and the swirl adds drama without extra effort.
One tip from my own trial-and-error journey: make sure the chocolate is slightly cooled before swirling. Hot chocolate will sink into the batter instead of sitting on top, and you’ll lose that defined marbled look.

Mini chocolate chips vs. chunks: What works best?
Once you’ve swirled the chocolate, sprinkle ½ cup of mini chocolate chips over the top before baking. Why mini chips? They distribute more evenly and melt quicker, giving you a more consistent bite. I’ve tested this recipe with chocolate chunks too, but they can create uneven pockets and weigh down the bars a bit.
If you’re feeling bold, try a mix-mini chips for topping and melted dark chocolate for the swirl. It’s a decadent twist that echoes the richness you get in layered desserts like pumpkin rolls.
Here’s a simple breakdown of your swirl options:
| Type | Effect |
|---|---|
| Mini Chocolate Chips | Light, even topping with soft melt |
| Melted Semi-Sweet Chips | Creates rich swirl, integrates with pumpkin batter |
| Chocolate Chunks | Bold flavor pockets, less swirl definition |
This is where your pumpkin bars get their personality. Some swirls come out looking like tie-dye, others like chocolate rivers-and no two trays are ever the same. That’s the fun of it.
Plus, the swirled effect gets even better when you slice into the cooled bars and reveal that contrast of rich chocolate against golden-orange pumpkin. It’s a visual payoff that makes these a hit at potlucks, especially alongside pumpkin spice lattes or cider.
Next, we’ll talk about making them ahead, freezing them like a pro, and how to store them for maximum freshness.

Serving & Storing Pumpkin Bars Like a Pro
Storage tricks for flavor and moisture retention
Once your pumpkin bars are out of the oven and fully cooled, resist the urge to toss them into the fridge uncovered. Moisture is key here. To keep them soft and gooey, store them in an airtight container at room temperature for up to 4 days. I like to layer a sheet of parchment between stacked bars to prevent sticking.
If your kitchen runs warm or you want them to last longer, refrigerate them-but bring them to room temp before serving. That’s when the chocolate softens again and the pumpkin flavor shines. Trust me, they’re even better the next day.
One little trick I’ve used: place a slice of bread in the container with your bars. Sounds weird, I know-but it helps lock in moisture without making them soggy. Just like it works with cookies!
These store just as well as baked pumpkin donuts-another fall favorite that benefits from cool, airtight storage.

Freezer-friendly options for holiday prep
Yes, these chocolate swirled pumpkin bars freeze beautifully. I often bake a batch ahead of time and stash half in the freezer for last-minute guests or a sweet snack when the craving hits.
To freeze:
- Let bars cool completely.
- Slice into squares.
- Wrap each bar in plastic wrap, then place in a freezer-safe zip bag or container.
They’ll keep for up to 2 months. When ready to serve, just let them thaw at room temperature for about 30 minutes, or microwave for 15 seconds if you like them warm and slightly melty.
These are a holiday lifesaver. While you’re prepping pumpkin cheesecake bars or pumpkin pies, you can have these ready in the wings-no stress, no fuss.
Here’s a quick storage guide for reference:
| Storage Method | How Long They Last |
|---|---|
| Room Temp (Airtight Container) | Up to 4 days |
| Fridge (Airtight) | Up to 7 days |
| Freezer (Individually Wrapped) | Up to 2 months |
Whether you’re gifting them or keeping a stash for yourself (no judgment), these pumpkin bars are just as convenient as they are comforting.
Before we wrap up, let’s answer some common questions people ask about baking and storing these irresistible bars.

FAQs
What makes pumpkin bars moist?
The moisture in pumpkin bars comes from a smart mix of pumpkin puree, brown sugar, and oil. The pumpkin puree provides natural moisture, while brown sugar helps retain it thanks to its molasses content. Oil (as opposed to butter) gives the bars a tender, melt-in-your-mouth texture that lasts for days.
Can you freeze chocolate swirled pumpkin bars?
Absolutely. Let the bars cool completely, then wrap them individually in plastic wrap and freeze in a zip-top bag or container. They’ll stay fresh for up to 2 months. Thaw at room temperature or microwave for 15 seconds for a warm treat.
What’s the best way to swirl chocolate into pumpkin batter?
After spreading the pumpkin batter into the pan, drop spoonfuls of melted semi-sweet chocolate on top. Use a butter knife or skewer to gently swirl in figure-eight motions. Avoid over-mixing so the chocolate swirl remains distinct and decorative.
Are pumpkin bars healthier than brownies?
Pumpkin bars tend to be lighter than traditional brownies because they’re often made with oil instead of butter and include nutrient-dense pumpkin puree. They may contain less fat and more fiber, especially if you reduce added sugar or use whole grain flour. Still sweet, but with a subtle health bonus!
If there’s one dessert that says “cozy fall day in a pan,” it’s these chocolate swirled pumpkin bars. They’re rich, tender, beautifully marbled, and surprisingly simple to make. Whether you’re baking for a crowd, prepping for a holiday, or just indulging your inner pumpkin spice lover, this recipe hits all the right notes.
You don’t need fancy tools or expert skills-just a few pantry staples, a swirl of chocolate, and a little baking joy. Like many of my other recipes, it’s all about flavor, fun, and that moment when someone takes a bite and says, “Wait… you made this?!”