If you’re searching for a pizza crust that combines the tangy depth of sourdough with a crispy exterior and chewy interior, you’ve found it! This artisanal sourdough pizza crust recipe will elevate your homemade pizza night to a whole new level. Not only is it packed with flavor, but it also offers a satisfying texture that’s perfect for showcasing your favorite toppings. Whether you’re a seasoned baker or a beginner, this step-by-step guide will help you create the best sourdough pizza crust ever.
Table of Contents
Why You’ll Love This Recipe
- Authentic Sourdough Flavor: The natural fermentation process gives this crust a tangy, complex taste that store-bought doughs can’t match.
- Versatile Base: Use it for classic pepperoni, veggie-loaded, or gourmet toppings-it’s the perfect canvas.
- Healthier Option: Sourdough fermentation can make the dough easier to digest and may lower the glycemic index compared to regular pizza dough.
- Impress Your Guests: This crust looks and tastes like it came from a high-end pizzeria, but it’s made right in your kitchen.
- Long Fermentation Benefits: The 48-hour fermentation develops deeper flavors and improves texture, making it worth the wait.
What you will need ?
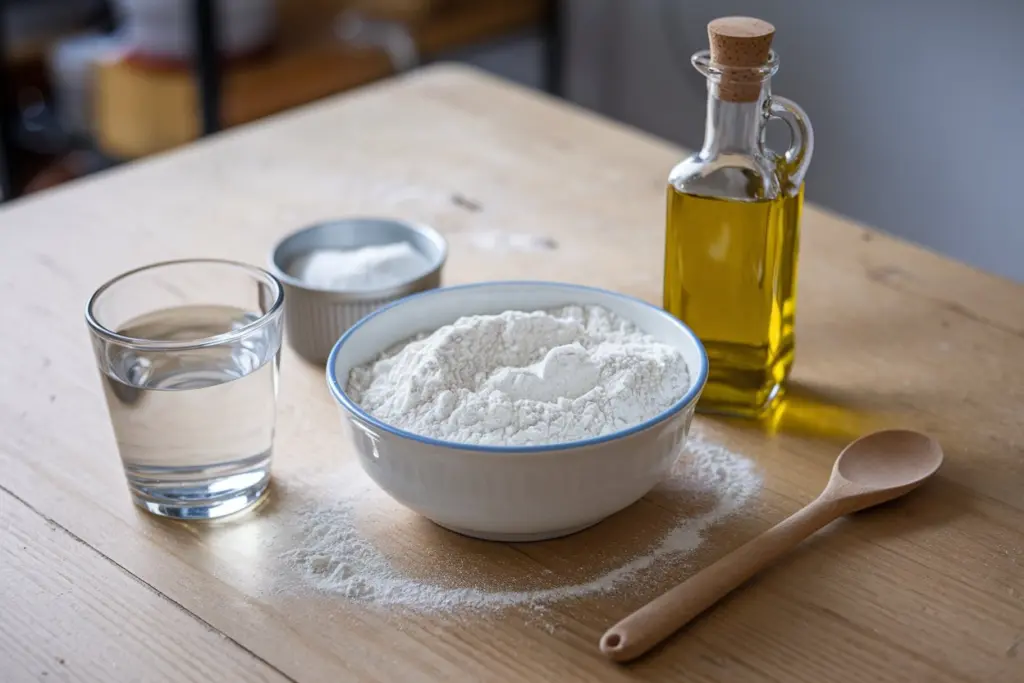
Here’s what you’ll need to create two 12-inch pizzas. Each ingredient is carefully chosen to ensure the best results, with substitutions and uses provided for flexibility.
1 cup sourdough starter (about 7.5 oz)
- Use For: This is the leavening agent and flavor powerhouse. It adds that signature tangy taste and helps the dough rise naturally.
- Ingredient Substitutions: If you don’t have a sourdough starter, you can create a quick substitute by mixing 1/2 cup flour and 1/2 cup water with 1/4 tsp active dry yeast. Let it sit for 12 hours at room temperature until bubbly.
2 cups water (about 16 oz)
- Use For: Hydrates the flour and activates the sourdough starter, creating the dough’s structure.
- Ingredient Substitutions: Use filtered or spring water to avoid chlorine, which can inhibit fermentation. If needed, warm tap water (around 80°F) works, but avoid hot water as it can kill the starter.
6 1/2 cups all-purpose flour (about 26 oz)
- Use For: Forms the base of the crust, providing structure and chewiness.
- Ingredient Substitutions: Swap with bread flour for a chewier texture or whole wheat flour for a nuttier flavor (reduce to 6 cups and add extra water if needed). For gluten-free, use a 1:1 gluten-free flour blend, but adjust hydration as it may vary.
1/2 tsp salt
- Use For: Enhances flavor and strengthens the gluten network for a better rise and texture.
- Ingredient Substitutions: Sea salt or kosher salt can be used; just ensure it’s finely ground. If on a low-sodium diet, reduce to 1/4 tsp, but note the flavor may be milder.
Olive oil (for greasing)
- Use For: Prevents the dough from sticking to bowls and surfaces during fermentation and shaping.
- Ingredient Substitutions: Avocado oil or melted butter can work, though olive oil’s mild flavor complements the crust best.

Equipment
To make this recipe a breeze, gather the following tools:
- Large mixing bowl
- Damp cloth or plastic wrap
- Measuring cups and spoons
- Kitchen scale (for accuracy)
- Dough scraper or sharp knife
- Rolling pin
- Pizza stone or heavy baking sheet
- Parchment paper (optional, for easier transfer)
- Oven mitts
Step-By-Step Guiding
Follow these detailed, extended steps to ensure your sourdough pizza crust turns out perfectly every time. Each step includes tips, explanations, and additional details to make the process foolproof and educational.
Step 1: Mix the Dough Base
- What to Do: In a large bowl, combine the sourdough starter and water. Stir vigorously with a wooden spoon or your hands until the starter fully dissolves into the water, creating a milky, bubbly mixture. Add the all-purpose flour and salt, mixing until a shaggy, uneven dough forms. Don’t worry if it looks messy-this is normal!
- Tips: Ensure your sourdough starter is active and bubbly (fed 4-6 hours prior). If it’s too thick, add a tablespoon more water. For accuracy, use a kitchen scale to measure ingredients, as volume measurements can vary.
- Why It Matters: This initial mix hydrates the flour and begins gluten development, setting the stage for fermentation.
Step 2: Let the Dough Rest (Autolyse)
- What to Do: Cover the bowl with a damp cloth or plastic wrap and let the dough rest at room temperature for 30 minutes. This process, called autolyse, allows the flour to absorb water and the gluten to start forming naturally.
- Tips: Keep the cloth damp but not soaking wet to prevent drying out the dough. Place the bowl in a draft-free area, like inside your oven (turned off) with the light on for gentle warmth.
- Why It Matters: Autolyse improves dough extensibility, making it easier to knead and resulting in a lighter, airier crust.
Step 3: Knead the Dough
- What to Do: After resting, transfer the dough to a lightly floured surface. Knead for 5-7 minutes, using the heel of your hand to push the dough away, then fold it back over itself. Continue until the dough feels smooth, elastic, and slightly tacky but not sticky.
- Tips: If the dough sticks to your hands, dust with a little more flour, but don’t overdo it-too much flour can make the crust dense. You can also knead in the bowl if it’s large enough. Test for readiness by stretching a small piece; it should form a thin “windowpane” without tearing.
- Why It Matters: Kneading develops gluten, which traps air during fermentation and baking, giving the crust its signature chew.
Step 4: First Fermentation
- What to Do: Lightly oil a clean bowl with olive oil, place the dough inside, and cover it with a damp cloth or plastic wrap. Let it ferment at room temperature for 24 hours. After this time, perform a “stretch and fold”: wet your hands, grab one side of the dough, stretch it upward, and fold it over the center. Rotate the bowl 90 degrees and repeat for all sides. Cover and let rest for another 24 hours.
- Tips: The dough should double in size and develop bubbles on the surface. If your kitchen is cold (below 70°F), fermentation may take longer-consider placing the bowl in a slightly warm spot or near a heater (not directly).
- Why It Matters: This long fermentation enhances flavor, improves digestibility, and creates air pockets for a light, crispy crust. The stretch and fold strengthens the dough without overworking it.
Step 5: Divide and Shape the Dough
- What to Do: After 48 hours, transfer the dough to a floured surface. Divide it into two equal portions using a dough scraper or sharp knife. Shape each portion into a tight ball by pulling the edges toward the center and pinching them together. Place the balls on a lightly floured surface, cover with a damp cloth, and let them rest for 2 hours.
- Tips: Wet your hands slightly to prevent sticking while shaping. If the dough feels too sticky, let it rest for 10 minutes before dividing. The resting period allows the gluten to relax, making it easier to roll out.
- Why It Matters: Shaping creates surface tension, which helps the dough hold its shape and rise evenly during baking.
Step 6: Preheat the Oven and Pizza Stone
- What to Do: About 45 minutes before baking, place a pizza stone or heavy baking sheet on the middle rack of your oven. Preheat the oven to 500°F (260°C). This high heat mimics a professional pizza oven and ensures a crispy bottom.
- Tips: If using a baking sheet, line it with parchment paper for easier cleanup. Ensure the stone is fully heated-tap it lightly; it should feel very hot. Use oven mitts to avoid burns.
- Why It Matters: A hot stone or sheet creates steam when the dough hits it, resulting in a crisp exterior and chewy interior.
Step 7: Roll Out and Top the Dough
- What to Do: On a floured surface, roll out each dough ball into a 12-inch circle, about 1/4-inch thick. If the dough resists, let it rest for 5 minutes, then continue. Transfer the rolled dough to a piece of parchment paper or a pizza peel dusted with cornmeal or flour. Add your favorite toppings, leaving a small border for the crust.
- Tips: Use a rolling pin or your hands to stretch the dough. For a rustic look, leave slight imperfections. If the dough tears, pinch it back together-it’s forgiving! Pre-bake the crust for 5 minutes if using wet toppings like fresh tomatoes to prevent sogginess.
- Why It Matters: Rolling ensures even thickness for consistent baking, while toppings should be balanced to avoid overloading, which can make the crust soggy.
Step 8: Bake the Pizza
- What to Do: Carefully slide the pizza (with parchment, if using) onto the preheated stone or sheet. Bake for 12-15 minutes, or until the crust is golden brown and the cheese (if using) is bubbly and slightly browned. Rotate the pizza halfway through for even cooking.
- Tips: Watch closely near the end-ovens vary, and the crust can go from golden to burnt quickly at high heat. Use a pizza peel or large spatula to remove the pizza safely. Let it cool for 5 minutes before slicing to set the structure.
- Why It Matters: High heat and proper rotation ensure a crisp bottom and evenly cooked toppings, while cooling prevents the toppings from sliding off.
Topping Suggestions
Get creative with your toppings to complement the tangy sourdough crust:
- Classic: Tomato sauce, mozzarella, pepperoni, and basil.
- Vegetarian: Roasted vegetables (zucchini, bell peppers, mushrooms), goat cheese, and arugula.
- Gourmet: Prosciutto, figs, gorgonzola, and a drizzle of honey.
- Spicy Kick: Spicy sausage, jalapeños, red onion, and a sprinkle of red pepper flakes.

How to Store & Reheating
- Storing: Wrap cooled, unbaked dough balls tightly in plastic wrap and store in the fridge for up to 3 days. For longer storage, freeze for up to 3 months-thaw in the fridge overnight before use. Baked pizzas can be refrigerated for 2-3 days in an airtight container.
- Reheating: Preheat your oven to 375°F, place the pizza on a baking sheet, and heat for 10-12 minutes until crispy. Avoid microwaving, as it can make the crust soggy. For frozen dough, let it come to room temperature for 2 hours before rolling out.
What to Serve With
Pair your sourdough pizza with these sides for a complete meal:
- Salad: A fresh arugula salad with lemon vinaigrette for a light contrast.
- Appetizers: Garlic bread or bruschetta for a carb-loaded starter.
- Drinks: A orange juice, or sparkling water with lemon.
- Dessert: Finish with a simple fruit sorbet or chocolate-dipped strawberries for balance.

FAQs
Can I speed up the fermentation process?
Yes, but it won’t develop the same depth of flavor. To speed things up, ferment at 80-85°F or add a pinch of yeast (1/8 tsp) during mixing. However, for the best results, stick to the 48-hour process.
What if my dough doesn’t rise?
If the dough doesn’t rise, your starter may be inactive. Ensure it’s bubbly and doubles in size when fed. If it still doesn’t rise, add 1/4 tsp instant yeast to the dough and let it ferment for 4-6 hours instead.
How do I know when the crust is done?
The crust should be golden brown on the edges and bottom, with a slightly crisp texture. The cheese (if using) should be melted and bubbly. Tap the bottom-it should sound hollow.
Can I freeze the baked pizza?
Yes, wrap baked pizza tightly in foil and place in a freezer bag. It can last up to 2 months. Reheat in a 375°F oven for 15-20 minutes.
This comprehensive guide ensures you’ll master the art of sourdough pizza crusts, impressing family and friends with every bite. Enjoy the process, experiment with toppings, and savor the results of your artisanal creation! 🌾🍕


